It is a pretty useful skill to know how to use the new iOS 17.2 (Beta) Journal app because it’ll allow you to easily keep track of your daily activities. It allows you to do this by having all information together in a single place so that you can focus on other more important things in your life.
So, without further adieu, let’s look at how you can use the iOS 17.2 Journal app to help you better your life. If you are someone that has used the app in the past then you may already know the basics, but there are a few new features that this app has gotten that you’ll definitely want to know about.
Setting Up The Journal App
The first thing that you’ll want to know, if you haven’t ever used the Journal app, is how you set it up for the first time.
1. Launch the app and click on the plus button
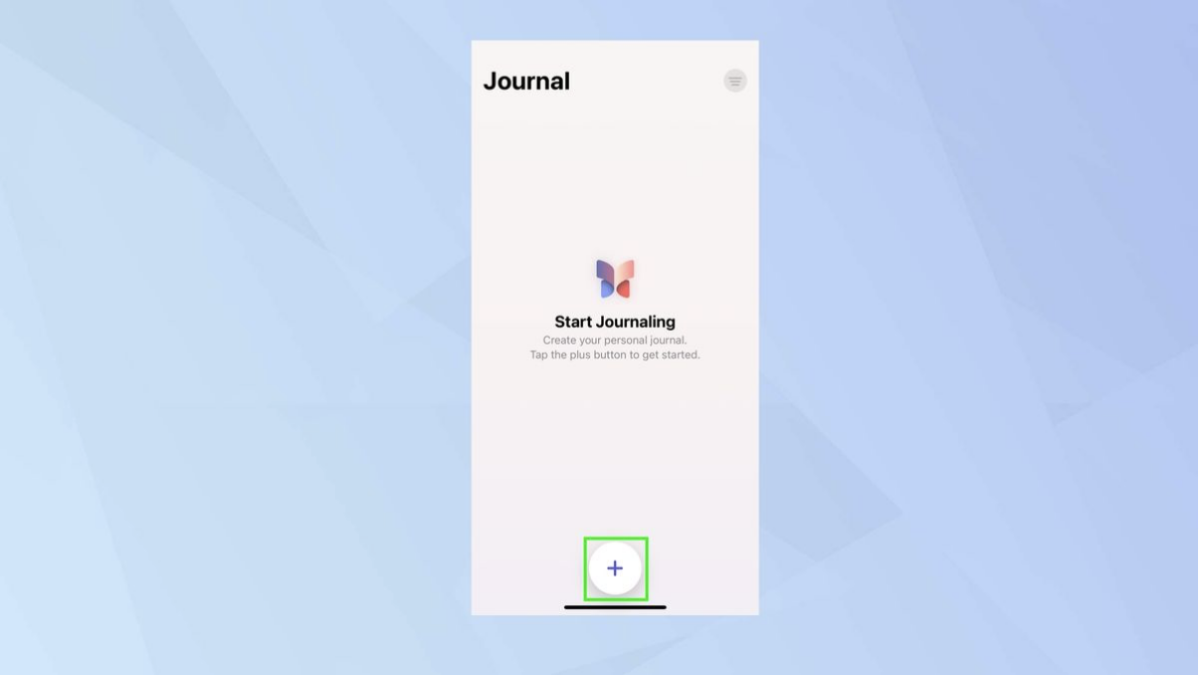
The first thing that you’ll want to do is obviously launch the Journal app and then tap the Plus button, which you’ll find all the way at the bottom of the screen.
2. Activate the Journaling suggestions
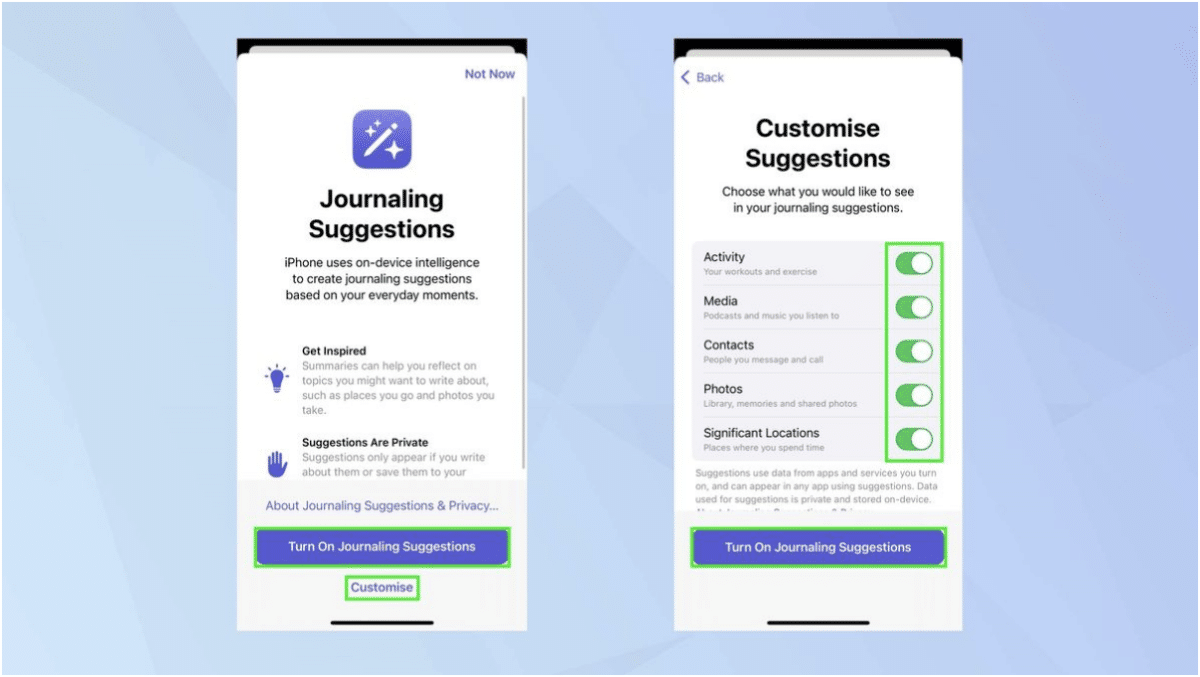
If you are completely new to this app and have never used it before then you’ll want to make sure that you have turned on Journaling suggestions. By doing this you’ll be able to allow the app to add details of your day-to-day activities automatically. An example of this is that the app would include journal entries of the places that you visit, the people that you call or message as well as the photos that you’ve taken or exercise routines, music or podcasts that you’ve played.
If you don’t want to let the Journal app take information of everything that you do then you can also choose what you want it to have control over, which you can choose by tapping on Customise. When you get into the Customisation menu you’ll be able to toggle the buttons to either include or exclude workouts, exercise, media, contacts, photos and significant locations. Once you’ve made your decisions and feel comfortable with the information that the Journal app will use you’re all done and from here you can just Turn On Journaling Suggestions.
3. Allow/Disallow Notifications
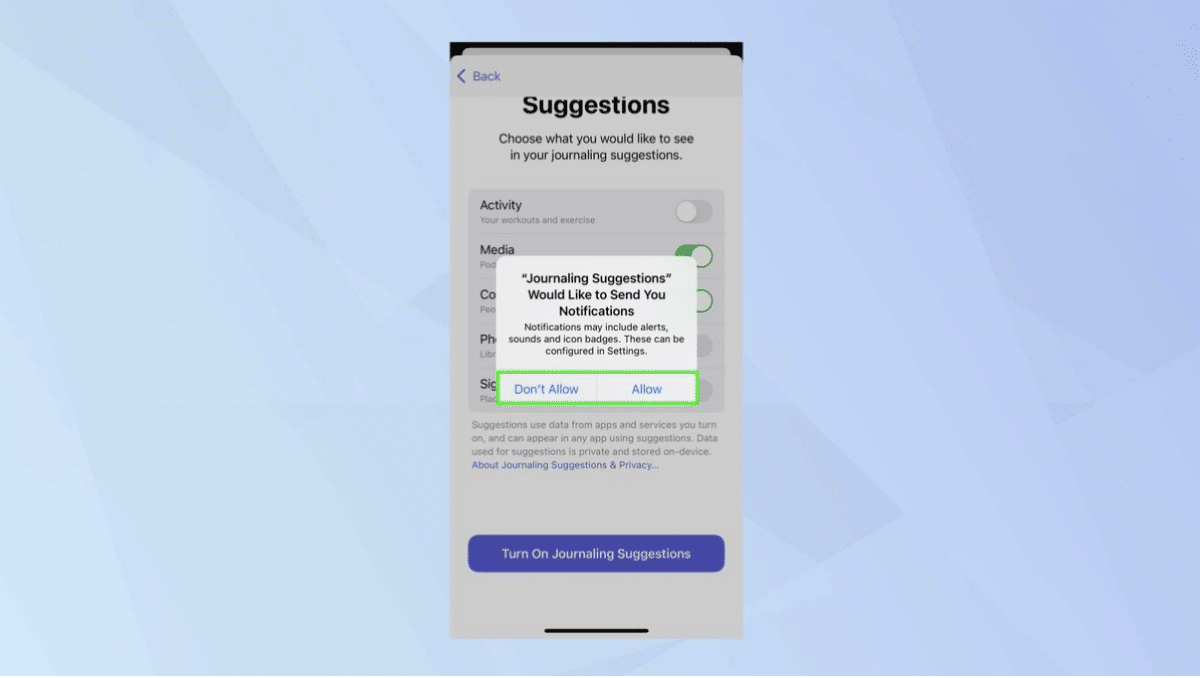
Once you activate the Journaling suggestions, you’ll be prompted with a message asking whether or not you’d want to allow Journaling Suggestions to send you notifications. From here you’ll just need to click on one of the choices, this choice doesn’t really matter too much, and is entirely just your preference.
Adding Entries in the Journal App
Now that you’ve officially got the app completely set up, it is time to make some entries…
1. Tap the Plus button…again
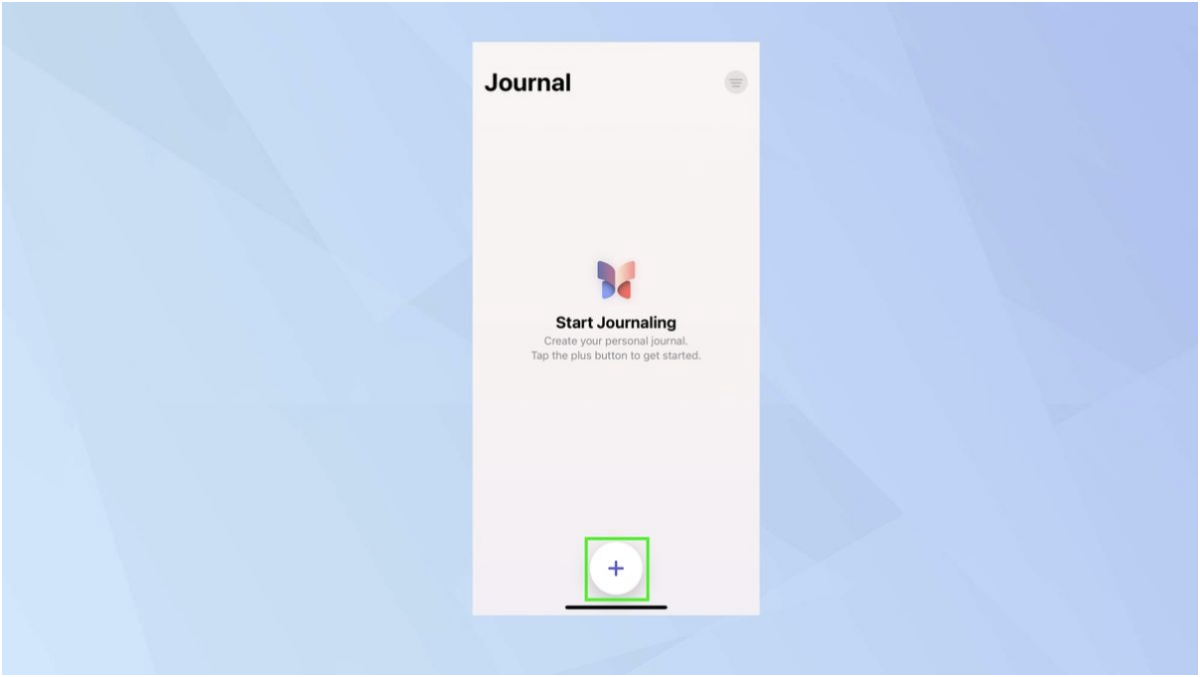
When you feel that you are ready to take the very first step and create your first Journal entry, all you’ll need to do is launch the Journal app and then click on the Plus button, located at the bottom of the screen, once again.
2. Choose “New Entry”
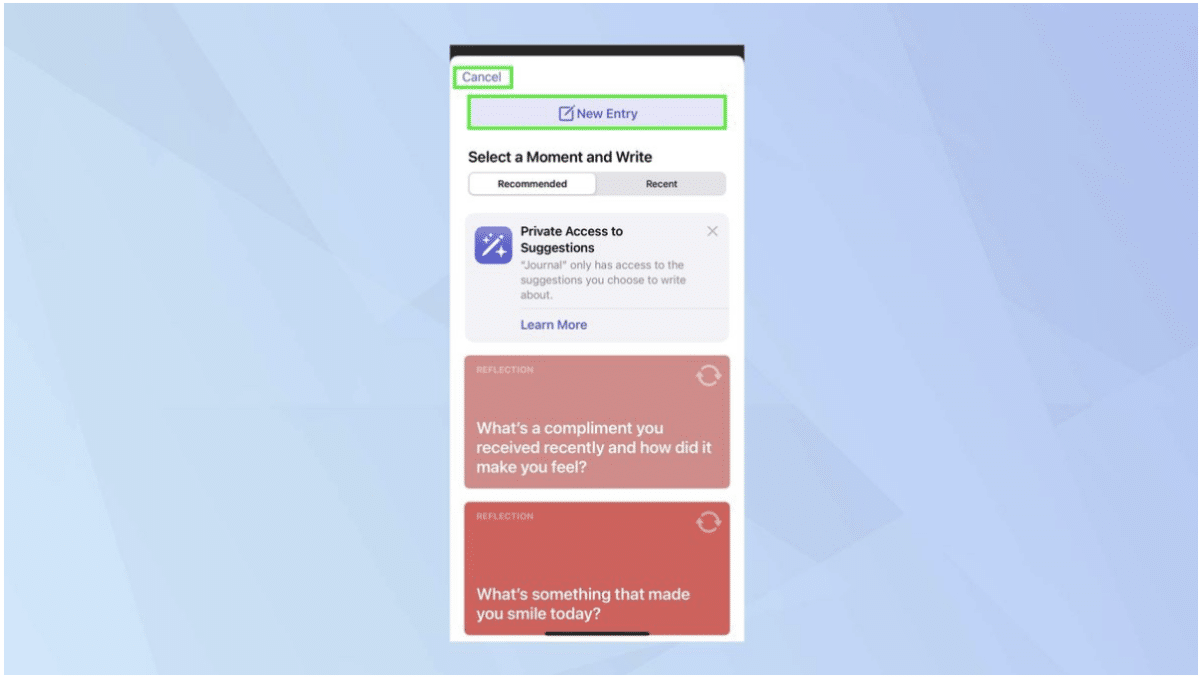
Now once you click this plus button you’ll be taken to a new page and on this page you’ll want to tap on “New Entry”, which you’ll find at the very top of your screen. If you do decide to change your mind at this point and don’t feel like doing anything, then you can instead click on the “Cancel” button, which is in the top left hand corner of the screen.
3. Begin Journaling
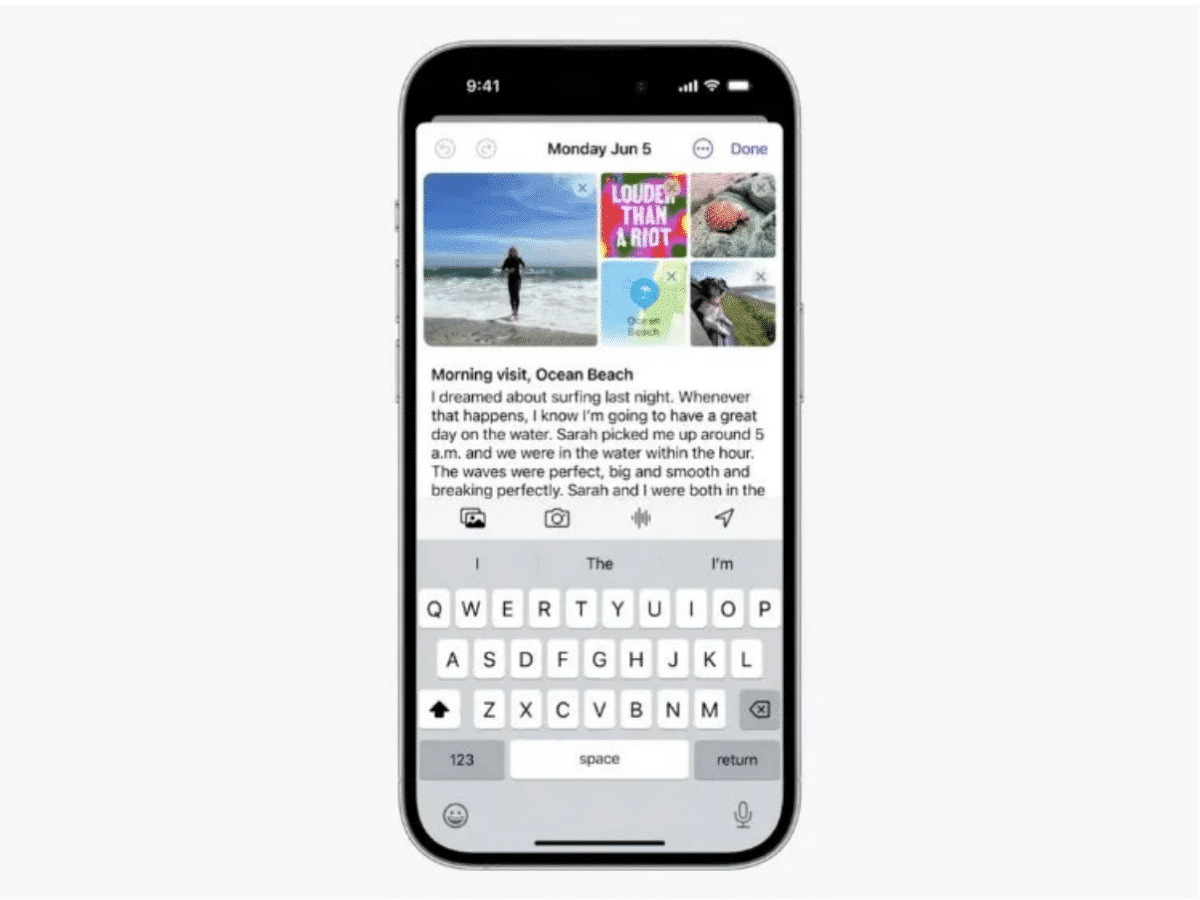
Now, when you get to this stage, you can just start writing your journal entry as you please, using your usual on-screen keyboard. Here you are allowed to write whatever you want, you can even add things such as pictures, emojis and voice notes, which you’ll see are all available as small icons just above your keyboard. All of your journal entries will be date-stamped.
4. Changing the Date
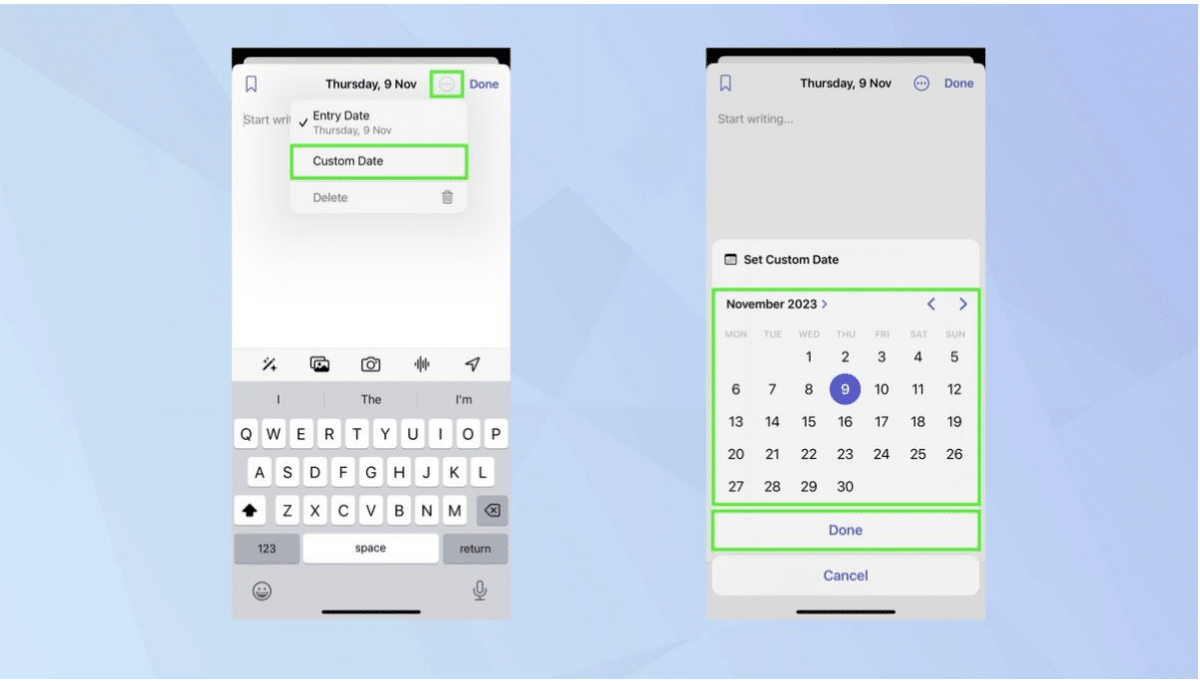
When you create a journal entry, the app will automatically date-stamp this entry, but you do have the option to change it. To do this you’ll need to tap on the three-dot menu at the top right hand corner of your screen when you are creating the entry and then click on “custom date”. When you click this button a pop-up calendar will appear and from here you can just select another date that you’d like instead and once you’ve chosen one you just click “done” underneath the calendar.
5. You’re done
When you’re happy with your Journal entry and want to save it just click on the “Done” button in the top right hand corner of your screen. If you have created a journal entry that you think is important and you want to pin it to the top then you could also tap the bookmark icon, which is in the opposite left corner of your screen.
Viewing and Editing Journal Entries
Now that you’ve created your journal entries, you might be interested in going back and reading or looking at them…
1. Launch the app and click your posts
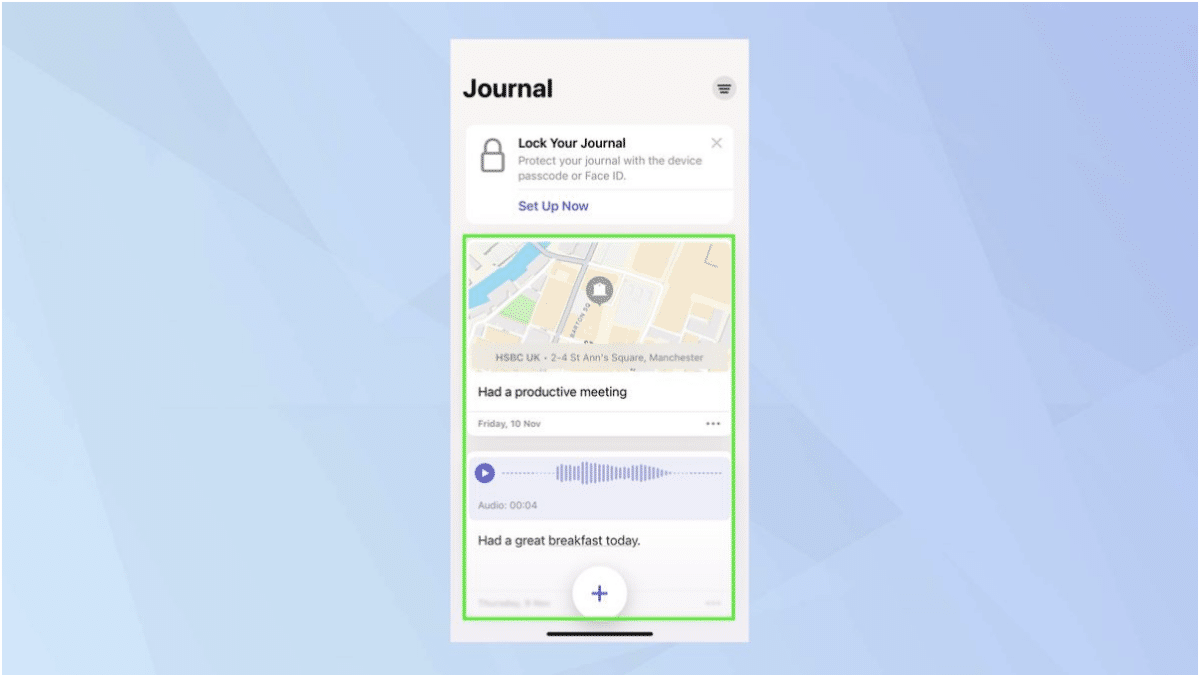
Once you’ve gone into the Journal app, after you’ve created at least one entry, that is, you’ll be greeted with your posts on the main screen and all you’ll have to do to view them in full is tap on them.
2. Filter to find entries quicker

If you are looking for a specific entry then you can filter all of your entries in order to try and find it a little bit quicker. To do this all you’ll have to do is tap on the filter icon, which you can find in the top-right hand side of your screen and then from here you’ll be able to search for a specific entry according to the type of media that you have included in them. An example of what you could search for is a Place, if you know which place your entry includes.
3. Editing journal entries
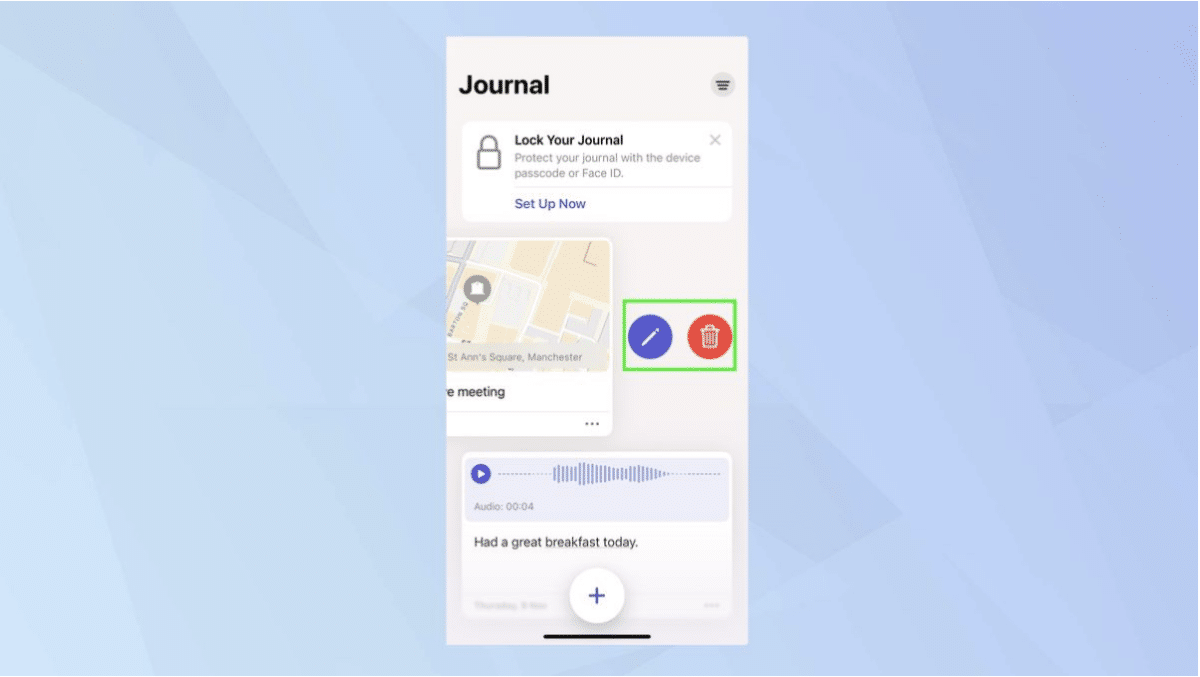
If you notice that you want to change or add something to your entry then you can edit it by swiping left on your Journal entry. When you do this then you’ll see two buttons come up, one to edit and then a red one to delete or remove the entry.
Locking Your Journal
If you are worried about someone getting into your phone or account and seeing your personal journal entries then you can add some security by adding a lock to them.
1. Click on “Set Up Now”
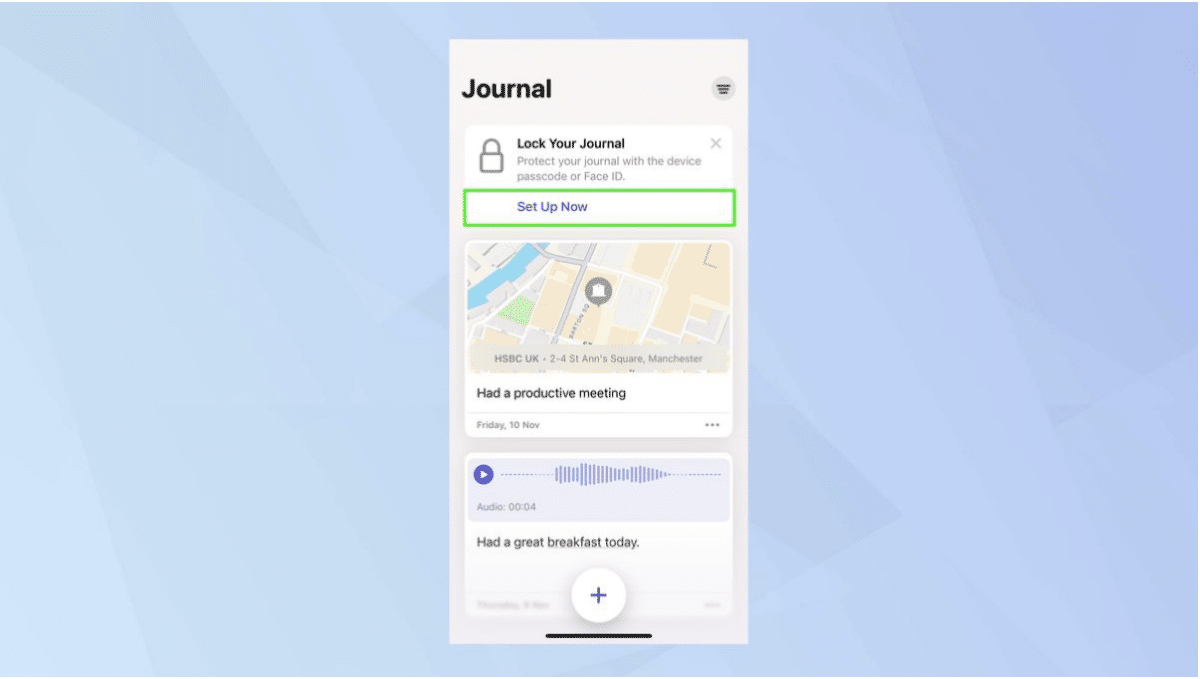
If you haven’t set up the locking feature for your Journal in your past then you’ll see a prompt at the top of your screen for you to set up the “Lock Your Journal” feature.
2. Click “Turn On”
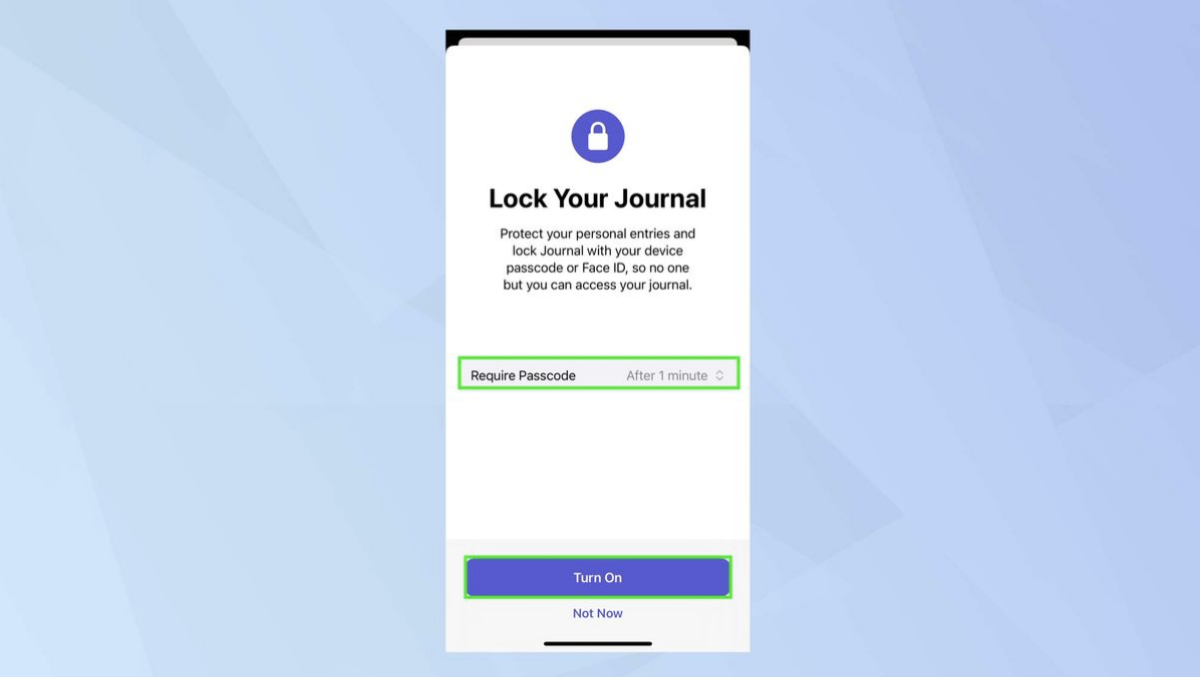
Now once you’ve gone through the whole set up process for the “Lock Your Journal” feature in this app you’ll then be greeted with a page on which you will be able to choose how much time should pass before you need to enter the password. All you have to do is tap on the box that says “Require Passcode” and then you’ll be able to choose between four various times, either immediately, after 1 minute, after 5 minutes or after 15 minutes. Then after that you just click on the illuminated button below, which says “Turn On”.
Final Words

There are a few benefits that people have realised when you keep a diary, and it is actually a proven way for you to boost your mental health, as it allows you to gather your thoughts and try and make sense of your days. Furthermore, if you have kept a journal or diary in the past you’ll know how enjoyable it is to go through it and look back and refresh yourself on some of your favourite memories and times that you have been through.
The iOS Journal app isn’t just a regular notes app where you’ll write down what happens at the end of each day though, where this app excels and differs from others in in the way it actually collects content from your iPhone and then suggests some entries for you, taking some of the work off of your shoulders. How it does this, is it’ll analyse certain experiences, such as the photos that you’ve taken or the people that you have communicated with, and then it’ll give you a prompt to create a journal entry based on this information that it has collected.
Hearing all of this and how much information this app will be taking from you may spark some privacy concerns in your, but Apple has made sure to address this. Not only does Apple allow you to lock your entries through Face ID and Touch ID, but the Journal app also makes use of on-device processing as well as end-to-end encryption to ensure that no one will be able to hack in and access your data remotely.
Now there you have a full guide on everything you may need to know about the new iOS Journal app. The new iOS 17.2 Journal app is quite a valuable tool for those seeking an organised and insightful way to document their daily lives. With its intuitive features and prompts, this app simplifies the process of journaling, allowing users to focus on the meaningful aspects of their experiences. The added benefits of improved mental health and the joy of revisiting cherished memories make this app a noteworthy addition to the iOS ecosystem.